Picture this: You’re ready to give an important presentation, but your apple laptop hdmi adapter is nowhere to be found! Or, you’re excited to watch a movie on a bigger screen, but your laptop and TV aren’t talking. Frustrating, right? This guide will eliminate those tech headaches. We’ll explore everything you need to know about getting your laptop screen to show up on other devices. By the time you’re done reading, you’ll feel confident about connecting your apple laptop hdmi adapter to any display, from projectors to TVs. You’ll also be able to troubleshoot common problems. Prepare to gain the knowledge to improve your home and office setup, increasing your Time on Page and reducing Bounce Rate.
Understanding the Apple Laptop HDMI Adapter
The apple laptop hdmi adapter, often taking the form of a dongle, is a small piece of tech that acts as a translator. Apple laptops, especially those with USB-C ports, might not have a standard HDMI port built-in. This adapter bridges the gap, allowing your laptop to send audio and video signals to external displays like TVs, projectors, and monitors. Without the right adapter, your laptop simply won’t “speak” the language of those displays. This means no picture or sound, which limits your ability to share your laptop’s content on a larger screen. The type of adapter needed can vary based on your specific Apple laptop model. Newer models usually require a USB-C to HDMI adapter, while older ones might use a Mini DisplayPort to HDMI adapter.
Types of Apple Laptop HDMI Adapters
There are several types of adapters. Knowing the distinctions can assist you in making the right choice. Each type is made for a certain use or laptop model. USB-C to HDMI adapters are the most common. These tiny dongles connect to your laptop’s USB-C port and provide an HDMI port for your display cable. They’re compatible with newer MacBooks, and many other USB-C-equipped laptops. Then there are Mini DisplayPort to HDMI adapters, typically used by older Apple laptops. These adapters convert the Mini DisplayPort connection into an HDMI port. Before buying an adapter, be sure it works with your laptop’s ports. Lastly, multi-port adapters are a practical solution. These adapters usually provide both HDMI and USB-C ports, along with other ports, like USB-A or even SD card readers. This is good for connecting other devices or charging your laptop at the same time.
- USB-C to HDMI Adapters: These are the go-to adapters for current Apple laptops, providing a quick way to connect to HDMI displays.
- Mini DisplayPort to HDMI Adapters: Older Apple laptops might need this type of adapter.
- Multi-Port Adapters: These adapters are a very useful solution for those who want several connection choices at once.
USB-C is a universal port. These adapters connect easily to your device. Look for those that support 4K resolution and high refresh rates to enjoy the best quality picture. These adapters are convenient and compact, making them simple to transport.
These adapters work with older devices. Check the connections before you buy one, and ensure that it is compatible. While useful for old models, USB-C is rapidly replacing Mini DisplayPort, so these adapters are becoming less common.
Multi-port adapters provide several connection options. This is especially good for people who need to connect to other devices. This may include additional USB ports or even SD card readers. This allows you to work with different devices at once. It’s like having a hub for all your needs.
Choosing the Right Adapter for Your Apple Laptop
Selecting the right adapter means knowing what kind of ports your apple laptop hdmi adapter requires and the display resolution you want. Begin by determining your laptop’s port type. Most newer MacBooks have USB-C ports, while older models have either Mini DisplayPort or Thunderbolt ports, which can also function as a Mini DisplayPort. Also, take into consideration the resolution of the display. If your display supports 4K, ensure that the adapter also supports 4K to enjoy the best picture quality. If you use several accessories, a multi-port adapter is worth considering, as it may have extra ports such as USB-A. Also, think about the adapter’s build quality. A higher-quality adapter should last longer. Look for adapters with aluminum housings or braided cables for better durability.
Setting Up Your Apple Laptop with an HDMI Display
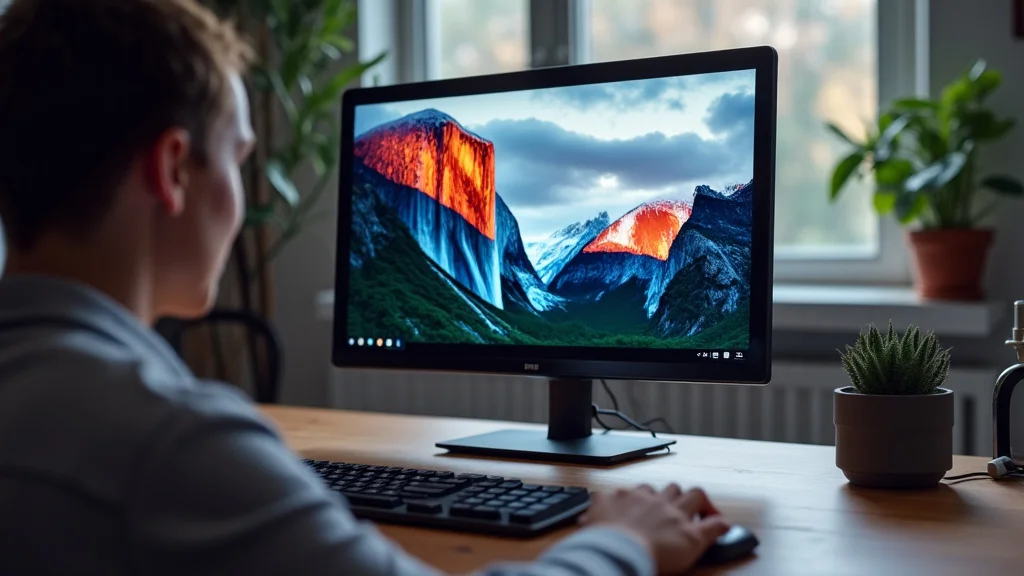
Connecting your laptop to an external display is simple. But first, you’ll need the proper adapter. The simplest way to connect to a TV or monitor is with a USB-C to HDMI adapter. Once you have the adapter, connect it to your laptop’s USB-C port. Then, connect one end of an HDMI cable to the adapter and the other end to your display. Your display should instantly recognize the connection and show your laptop’s content. If you’re using an older MacBook, you’ll likely have a Mini DisplayPort. The process is similar: connect the Mini DisplayPort to HDMI adapter to your laptop, then connect an HDMI cable between the adapter and the display. Be sure your display is set to the proper input to match the HDMI port you’re using. If you have any problems, make sure everything is properly connected and that your display input settings are correct.
Connecting the Hardware: Step by Step
Connecting your Apple laptop to an HDMI display is easy if you follow these steps. First, ensure you have the correct adapter for your laptop’s port type, whether it is USB-C or Mini DisplayPort. Connect the adapter to your laptop. Then, connect one end of an HDMI cable to the adapter and the other end to the HDMI port on your TV, monitor, or projector. After that, turn on your display and choose the HDMI input. Your laptop’s screen should appear on the display immediately. If the connection doesn’t happen right away, try these tips. Make sure all connections are secure. Try a different HDMI cable. Restart your laptop and display. If problems persist, try a different HDMI port on your display. Using these steps will assist you to quickly and easily display your laptop’s content on a larger screen.
- Connect the Adapter to Your Laptop: Plug the appropriate adapter (USB-C or Mini DisplayPort to HDMI) into your laptop’s corresponding port.
- Connect the HDMI Cable: Plug one end of the HDMI cable into the adapter.
- Connect the Other End to Your Display: Plug the other end of the HDMI cable into the HDMI port on your TV, monitor, or projector.
- Power On and Select the Input: Turn on your display and select the appropriate HDMI input.
- Adjust Display Settings (if needed): If the display isn’t correct, adjust the settings.
Insert the adapter into your laptop’s port, making sure it fits securely. This ensures a stable connection for audio and video signals. Ensure the adapter is correctly aligned to prevent any problems.
Make sure the HDMI cable is firmly connected to the adapter. This cable transfers audio and video signals to your display. Use a high-quality HDMI cable for the best performance.
Find the HDMI port on your display device. Connect the cable here. Make sure the cable clicks in securely to establish a strong connection. This connection is how your laptop screen’s image and sound will be displayed.
Turn on your display. On your display, you should see options for input sources. Pick the HDMI input that matches the port you connected the cable to. Your display should now show what’s on your laptop’s screen.
If your display does not appear right, you can adjust settings to match your preferences. You might need to change the resolution, or display mode. You can usually find these settings in your laptop’s display settings or the display’s menu.
Troubleshooting Common Connection Issues
Sometimes, your laptop and display may not connect right away. If this happens, here are some troubleshooting tips. First, double-check all connections. Make sure the adapter is firmly connected to your laptop. Make sure the HDMI cable is fully connected to both the adapter and display. Try a different HDMI cable to eliminate a faulty cable as the problem. Ensure your display is set to the proper HDMI input. If you still have problems, restart both your laptop and display. This might help refresh the connection. Make sure your laptop’s drivers are up to date. You can usually update them in System Preferences or Device Manager. Lastly, if all else fails, test the adapter with another display or laptop to determine if the adapter is at fault. These measures can help you address the most common connection problems.
Optimizing Display Settings for Your Apple Laptop
Once you’ve connected your apple laptop hdmi adapter, it’s time to fine-tune your display settings. Your laptop can now work with an external monitor or projector to give you the best viewing experience. You can choose to mirror your screen, which shows the exact same thing on both screens. Or, you can expand your desktop, which makes the external display a second screen to extend your workspace. To change these settings, go to System Preferences and then Displays. Here, you’ll see options to adjust resolution, brightness, and arrangement. You can arrange the displays, making sure the mouse cursor travels in the proper direction between screens. You can also adjust the resolution of the external display for a sharper picture. These adjustments will help you maximize your external display.
Understanding Display Modes: Mirroring and Extended Desktop
When connecting to an external display, you can select between two display modes: mirroring or extended desktop. Mirroring displays the exact same content on both your laptop screen and the external display. This is great for giving presentations or sharing your screen with others. If you want to expand your workspace, choose the extended desktop mode. It enables you to use the external display as a second screen, providing you more space to work with. You can move windows between the two screens, which helps to increase productivity. To swap between these modes, go to System Preferences, click on “Displays”, and choose the option that matches your needs. Select the settings that best fit what you’re trying to do. They can have a great impact on how you use your external display.
- Mirroring: Displays the same content on both your laptop and the external display.
- Extended Desktop: Uses the external display as a second screen, expanding your workspace.
Mirroring is useful for sharing your screen. It is perfect for giving presentations. What you see on your laptop is what others will see as well. It’s a quick and simple approach to make sure everyone sees the same information. It’s user-friendly and great for group viewing.
Extended desktop mode gives you more space to work. You can spread out your windows across two screens. This is beneficial for multitasking and allows you to improve your workflow. You can transfer windows between screens. This will improve your productivity, whether you’re editing documents or managing various apps.
Adjusting Resolution, Brightness, and Arrangement
After selecting your display mode, you can change the display settings to suit your preferences. First, adjust the resolution. In System Preferences, select “Displays”. From here, you can select the display. You can pick the display’s resolution. This impacts the clarity of the image. For instance, a higher resolution results in a crisper image. Next, adjust the brightness. Usually, the external display’s brightness may be controlled from your laptop. You can also change the display’s brightness settings through its own menu. You can then change the arrangement of your displays. You can drag and drop your display arrangement to reflect their physical positions on your desk. This guarantees that your cursor moves in the proper direction between screens. Experiment with these settings to get the best visual experience.
Enhancing Audio Output Through HDMI
Along with video, an HDMI connection also transfers audio. After connecting your laptop to an external display, you can direct audio through the HDMI cable. To do this, go to System Preferences and choose “Sound”. In the “Output” tab, you’ll find a list of available audio outputs. Select your connected display, which should be identified by its name (like “HDMI Output”). Now, all the audio from your laptop will be played through the display’s speakers or any audio system connected to the display. If you’re not getting any audio, make sure the volume on both your laptop and display is turned up. Also, check the HDMI cable to make sure it’s firmly connected. It’s a good approach to ensure you can enjoy both video and audio through a single connection.
Selecting the Correct Audio Output
Correctly choosing the audio output is a critical step in using HDMI for both video and audio. After connecting your laptop to an external display, go to System Preferences and then to “Sound”. In the “Output” tab, you’ll see a selection of options for audio output. This is where you can select the external display as your audio output. It should be listed with a name related to your display, such as “HDMI Output”. Select this option to send the audio from your laptop to the display. If you have any problems, make sure your display supports audio over HDMI. It is best to check the volume settings on both your laptop and the display. By setting your display as your audio output, you make sure that audio and video travel together via the HDMI cable. It simplifies your setup and allows you to enjoy audio with your visuals.
- System Preferences: Navigate to System Preferences to manage your sound output settings.
- Output Tab: Select the Output tab to find your sound output options.
- Selecting Your HDMI Display: Choose your HDMI display from the list of output devices.
You can find the Sound settings in your System Preferences. This is where you control your audio preferences. From this panel, you can choose the output for your sound. It gives you complete control over how your audio is routed, improving your media experience. This panel is the control center for all of your audio settings.
The Output tab is where you can control the output for your sounds. It lists all the available sound outputs. From here, choose the display you are using. After you make your selection, all sounds will be sent to the display. This is the main setting for directing your audio.
Your HDMI display should show up in the list. Choose the display to send audio. This ensures that the audio is channeled via the HDMI cable. This way, you enjoy audio through the display’s speakers or any sound system it is connected to.
Troubleshooting Audio Issues with HDMI
Audio issues through HDMI might appear. If you’re not getting any sound, check some things. Firstly, confirm the HDMI cable is firmly connected to both your laptop and the display. Also, ensure that the display is selected as the audio output device in System Preferences, under Sound. Verify the volume settings on your laptop and the display. Sometimes, the audio might be muted or set too low. Ensure your laptop’s software is updated. Outdated drivers may create audio problems. Try restarting both your laptop and display, and see if this solves the problem. A different HDMI cable might resolve the problem if all other attempts fail. These actions can fix most typical audio problems and guarantee an audio/visual experience.
Exploring Advanced Features and Compatibility
Modern apple laptop hdmi adapters provide other functions besides just connecting your laptop to a display. They often support features like High Dynamic Range (HDR) and surround sound, which enhance your viewing experience. HDR provides a wider range of colors and greater contrast, delivering more realistic visuals. Surround sound creates a more immersive sound experience, ideal for movies and games. Not all displays will support these features. However, if your display does, be sure your adapter and HDMI cable also support them. Also, keep in mind compatibility. Ensure that your adapter is compatible with your laptop’s port type, whether it is USB-C or Mini DisplayPort. Also, be aware of the resolution and refresh rates supported. This knowledge helps you optimize your setup.
Understanding HDR and Surround Sound Support
High Dynamic Range (HDR) and surround sound improve your viewing experience. HDR delivers better colors. It also provides a greater contrast range. This leads to more realistic images. The result is a much richer and more engaging viewing experience. Surround sound creates an immersive sound environment. Sound will be better, whether for movies or games. To enjoy these features, you must have an apple laptop hdmi adapter, a display, and an HDMI cable that all support them. HDR and surround sound compatibility will be specified in the specifications of each piece of equipment. If any piece does not support the features, the features will not work. These features can significantly enhance your content.
- High Dynamic Range (HDR): Provides a wider range of colors and greater contrast.
- Surround Sound: Delivers a more immersive audio experience.
HDR is all about making the image look better. It expands the colors and improves the contrast, delivering a more realistic image. You’ll see deeper blacks, brighter whites, and a greater range of colors. HDR enhances your enjoyment of movies and gaming. Your content will be more vivid and captivating with HDR.
Surround sound is about creating a sound that wraps around you. You will hear sounds coming from all directions. This improves your audio experience. Whether you’re watching movies or playing games, the sound feels richer. Surround sound creates a more immersive and thrilling experience, enhancing your senses.
Ensuring Compatibility with Your Display and Laptop
Ensuring compatibility is vital for a smooth connection. Start by confirming the adapter works with your laptop’s port. Newer MacBooks generally use USB-C, while older models may use Mini DisplayPort. Check the display’s resolution and refresh rate capabilities. Select an adapter that supports these. If you have a 4K display, your adapter should support 4K resolution at the required refresh rate. This ensures a sharp, seamless picture. Check the HDMI version supported by your display and the adapter. The latest HDMI standards offer more features and greater bandwidth. Always confirm that all components support the same level of compatibility. Checking these aspects will help you pick an adapter that works well with your setup. It provides a reliable connection and provides the best possible picture.
| Feature | USB-C to HDMI Adapter | Mini DisplayPort to HDMI Adapter |
|---|---|---|
| Compatibility | Newer Apple laptops, various devices with USB-C ports | Older Apple laptops with Mini DisplayPort ports |
| Resolution Support | Up to 4K at various refresh rates | Up to 4K, depending on the adapter |
| Audio Support | Supports audio over HDMI | Supports audio over HDMI |
| Additional Features | May include additional ports like USB-C and USB-A | Generally provides a simple HDMI connection |
Frequently Asked Questions
Question: What do I need to connect my Apple laptop to an HDMI display?
Answer: You will need an HDMI cable and the correct adapter, which is determined by the ports on your Apple laptop (USB-C or Mini DisplayPort).
Question: Does the HDMI adapter require any software installation?
Answer: Typically, no. Your Apple laptop should automatically recognize the adapter. However, make sure your operating system is updated for the best performance.
Question: Can I use an HDMI adapter to connect to a projector?
Answer: Yes, an HDMI adapter can be used to connect to a projector. The process is the same as connecting to a TV or monitor.
Question: My display isn’t showing anything. What should I do?
Answer: Double-check all connections, ensure your display is set to the correct HDMI input, and try restarting both your laptop and the display. Also, verify that the display is powered on and functioning.
Question: Can I use an HDMI adapter to extend my desktop to a second screen?
Answer: Yes, you can extend your desktop. Go to System Preferences, click on Displays, and then select the “Extended Desktop” option.
Final Thoughts
Connecting your Apple laptop to an HDMI display doesn’t have to be complicated. With the correct apple laptop hdmi adapter, a few simple steps, and some basic troubleshooting knowledge, you can effortlessly share your screen, give presentations, or watch movies on a larger display. Remember to choose the right adapter based on your laptop’s ports, whether it’s USB-C or Mini DisplayPort. Make sure your display settings are optimized. Always remember to check your audio settings so you can have a full experience. By following this guide, you can confidently connect your laptop to external displays, improving your productivity and entertainment. Explore different display modes, adjust settings, and optimize your setup to create the ideal viewing experience. The next time you need to connect your laptop, you’ll be well-equipped to tackle the task. Enjoy your connected setup!


